 Scleroscopio Shore Mod. C, quarta parte.
Nell`inventario particolare del 1919 al n° 2046 si legge:
«Scleroscopio di Shore per la determinazione della durezza degli acciai – ₤ 2.150,30».
Nell`inventario D del 1937 al n° 652 si legge: «Scleroscopio Shore munito di martelletto con punta di diamante, racchiuso in cassetta con i seguenti accessori: un tubo di vetro di ricambio con relativo martelletto per prova materiali teneri. Tre campioni per prova apparecchio. Una piccola chiave in bustina di cartone. – ₤ 1500» .
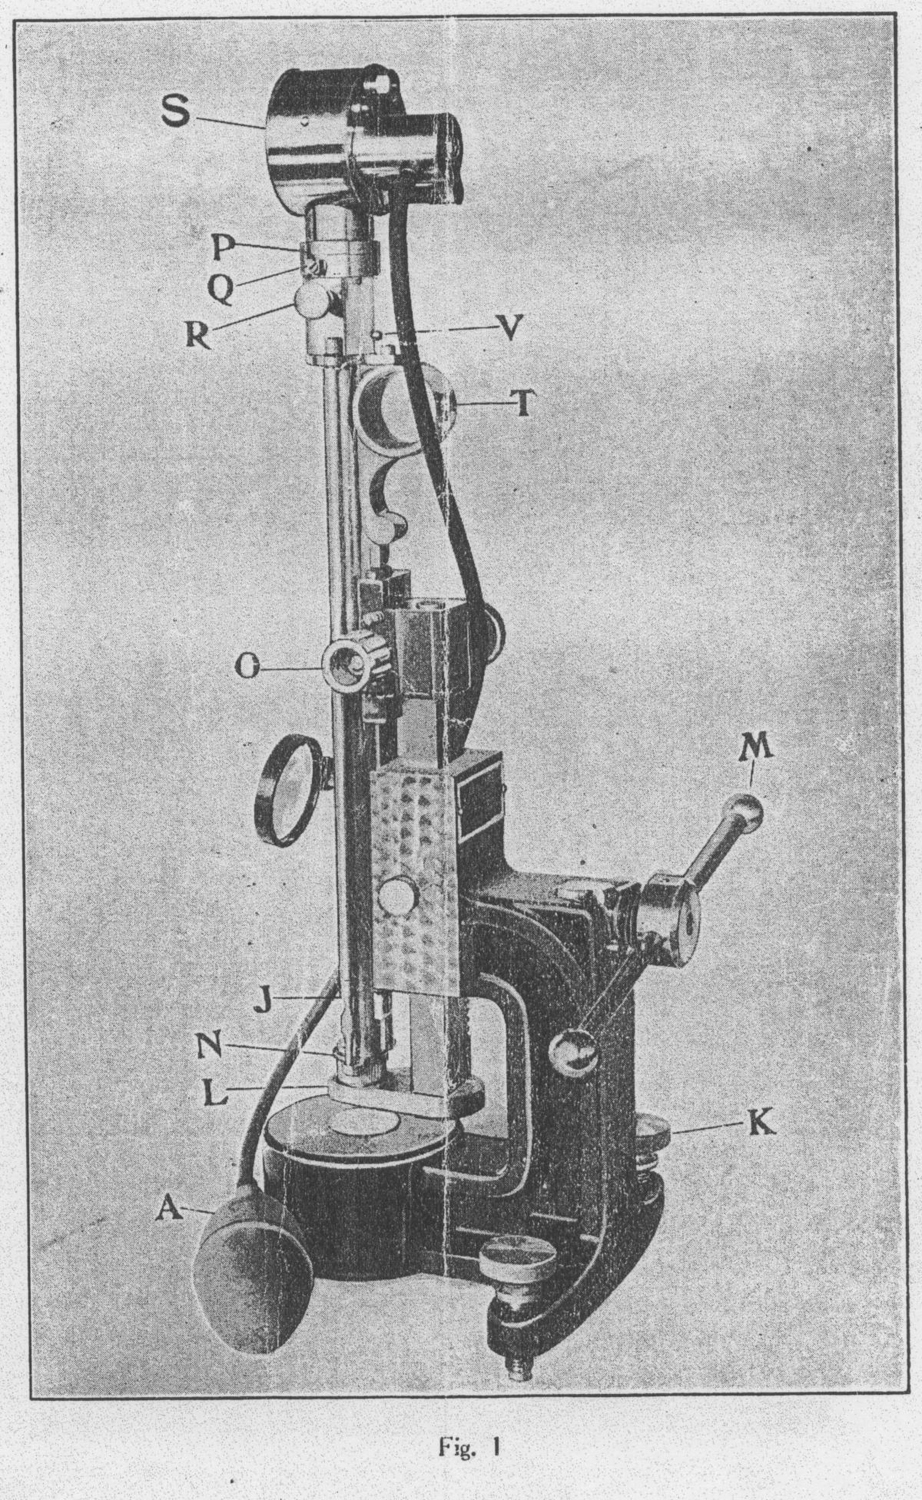
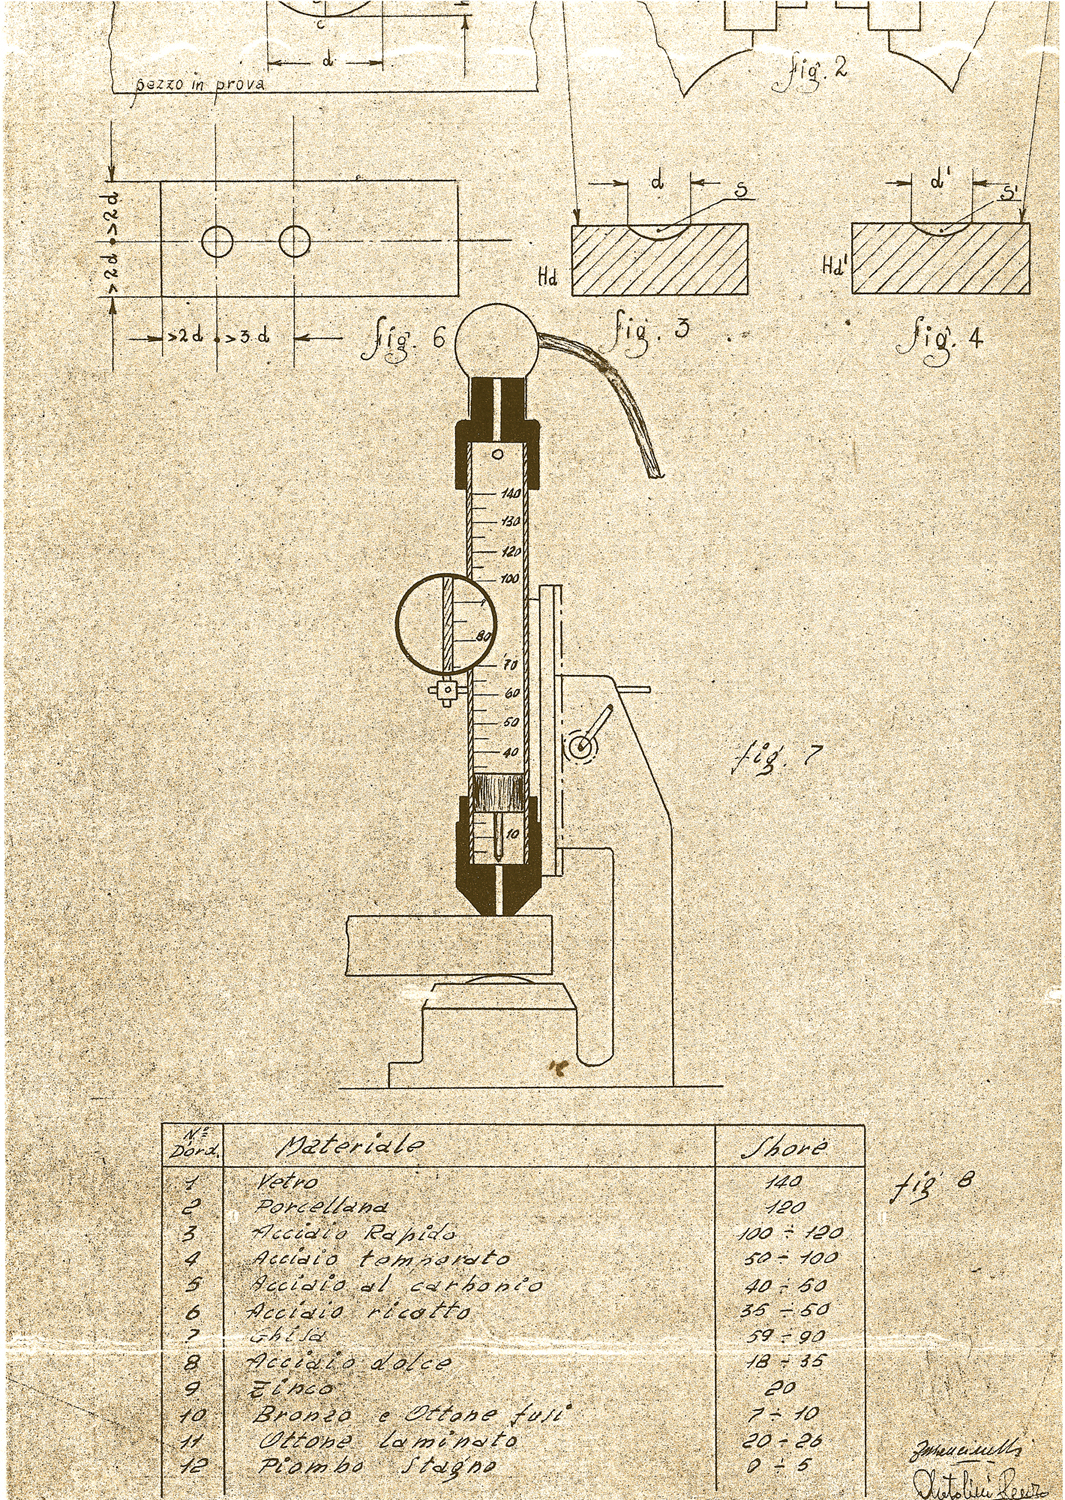
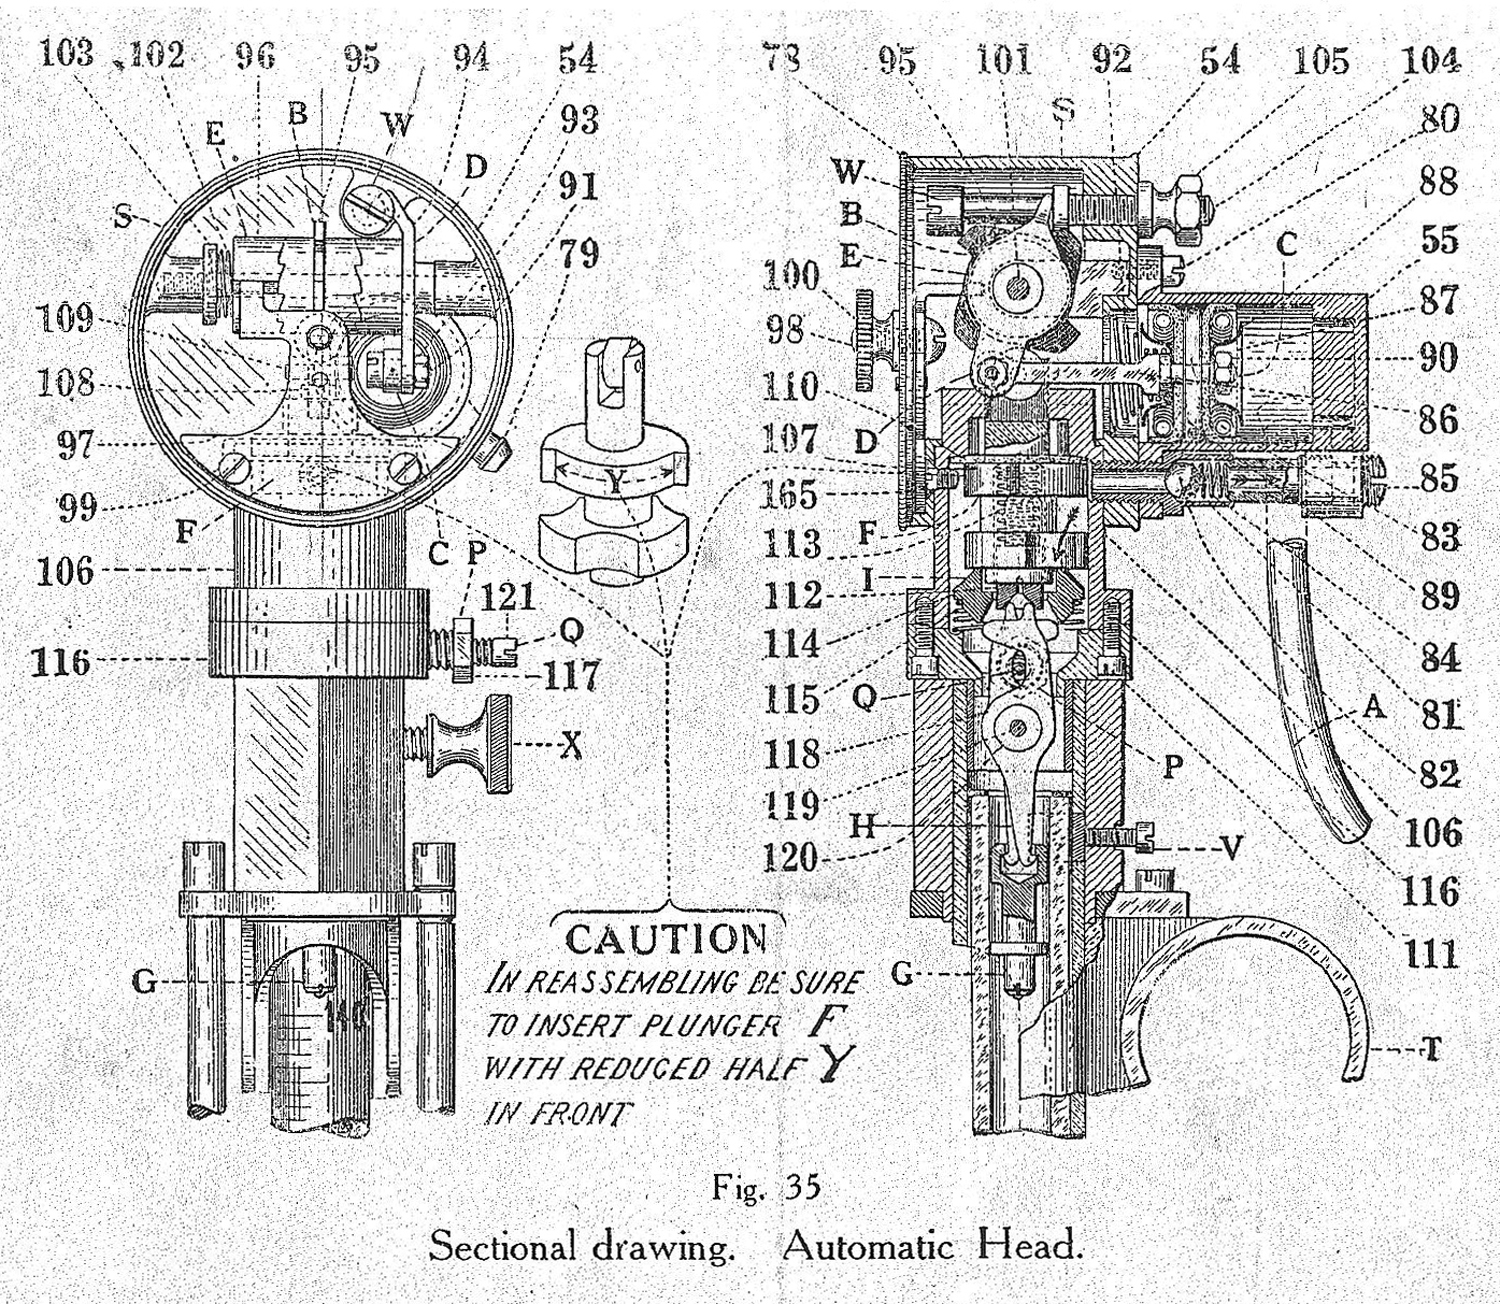
La terza figura è un disegno rinvenuto nello schedario del Laboratorio Tecnologico e risalente forse agli anni Trenta del Novecento che reca due nomi: il primo illeggibile (..Mancinelli ?), il secondo tal Antolini Renzo, dell’Istituto Montani. La quarta figura mostra due spaccati della parte superiore dello scleroscopio.
Riportiamo qui di seguito solo alcune parti sintetiche delle istruzioni.
«DIRECTIONS FOR OPERATING AND ADJUSTMENT.
To pick up and release the drop hammer of the Automatic Scleroscope only one bulb is pressed. This acts on the timer cam B through piston C, Fig. 35, with the result that the compensating valves are seated and unseated alternately at the proper time to utilize the pressure and suction of the hand bulb.
THE TEST PIECE should be as smooth as possible without actually having a glass finish, and the surface on which the test is to be made should be level. On filable metals, a file having not less than 64 teeth to the inch should be used. On hard steel use a smooth emery wheel and grind on the side. Cold rolled metals are plenty smooth enough.
SHEET AND FLATS must be tested in the clamping base Fig. 2. Note: always clamp securely by pressing on the lever M when the drop is made. When this is done right the sound is a should thud, when it is done wrong a hollow jingling sound gives the warning.
TOOLS AND ODD PIECES IF SMALL must be tested with the istrument on the swing arm, Fig. 51, clamped in a vise. This must be done so that there will be non hollow sound. [Vedi la quarta parte dedicata a questo strumento, N. d. R.].
THICKNESS OF SHEETS. If hard steel, must be at least 6 thousandths inch, or if soft brass 15 thousandths inch, if thinner, pile up enough pieces to get this thickness. Have them flat.
READING INSTRUMENT. The top of the drop hammer is taken as the indicator . Thus if it falls on a metal and rebounds to 65 on the scale, that metal is then 65 hard, etc.
ILLUMINATION. Light must always come from the top and should be strong enough. The glisten thus seen on the top of the hammer is the best indicator.
GETTING RANGE. To read accurately, make one hit and view the rebound from a little extra distance so that you will know where to look for the final accurate readings. Thus, it rebounds to about 50, or it may be only 10; in either case look around that figure, but rather a little below. If you look above, you will miss it.
CAUTION. Never hit the same spot twice or too near. Test on a new spot every time. Never allow hammer to drop without striking something under, it will break the glass.
TAKING CUT HAMMERS. First draw up to the top and then after releasing knurled screw R, lift off automatic head. the hammer remains on the hooks therein».
Per consultare le altre schede scrivere “Shore Mod. C” su Cerca.
Le istruzioni originali dalle quali sono state tratte le figure sono presso il Laboratorio Tecnologico della Sezione Meccanica.
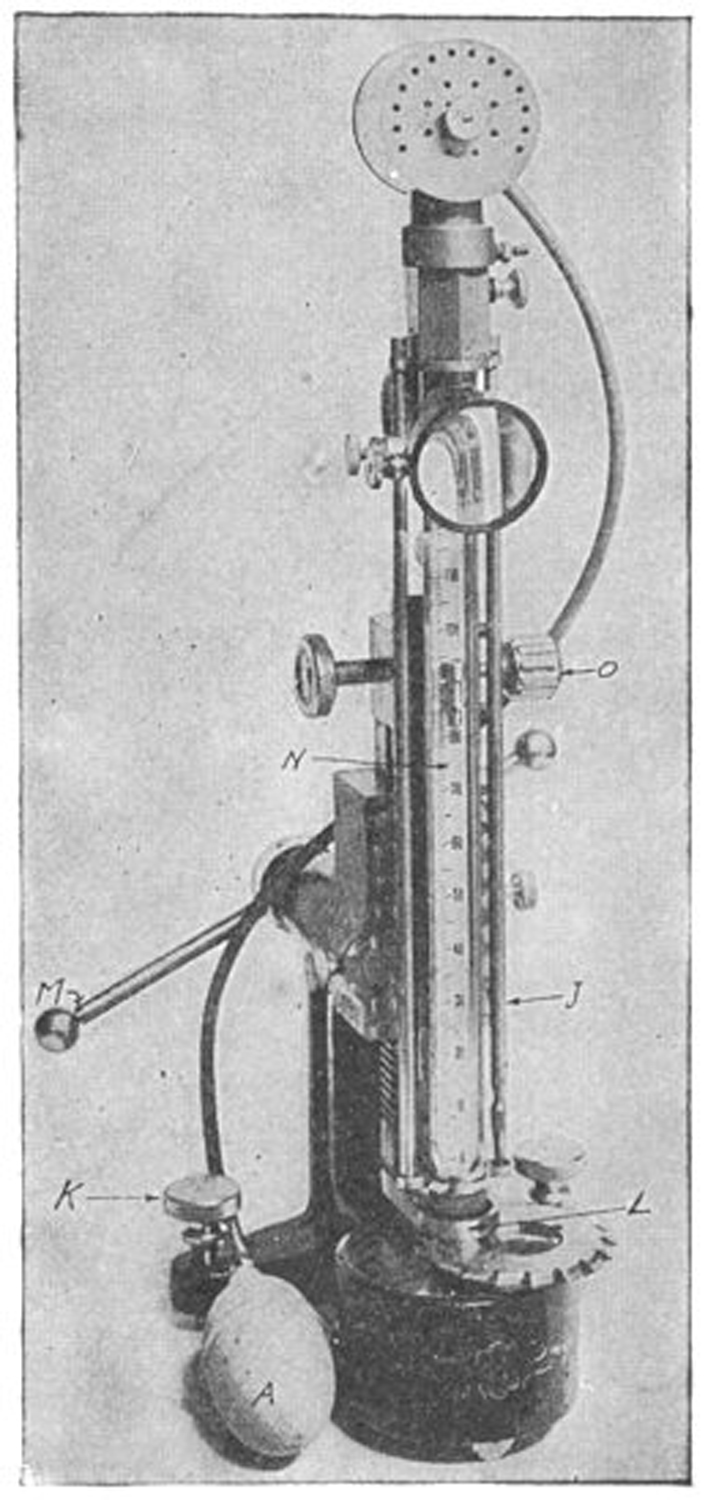
Per dare una più esauriente illustrazione sull’uso dello scleroscopio in mostra al Museo MITI si è ritenuto opportuno riportare in fondo alcune figure, tratte da un opuscolo di istruzioni privo di data, anche se riguardano il modello successivo C2. Dette istruzioni, dalle quali sono state tratte le figure, sono presso il Laboratorio Tecnologico della Sezione Meccanica.
Lo strumento è esposto al Museo MITI su proposta di Fabio Panfili.
Si ringrazia il P.I. Angelo Sgammini per la preziosa collaborazione nelle ricerche.
Elaborazioni, ricerche e testo a cura di Fabio Panfili
Per ingrandire le immagini cliccare su di esse col tasto destro del mouse e scegliere tra le opzioni.